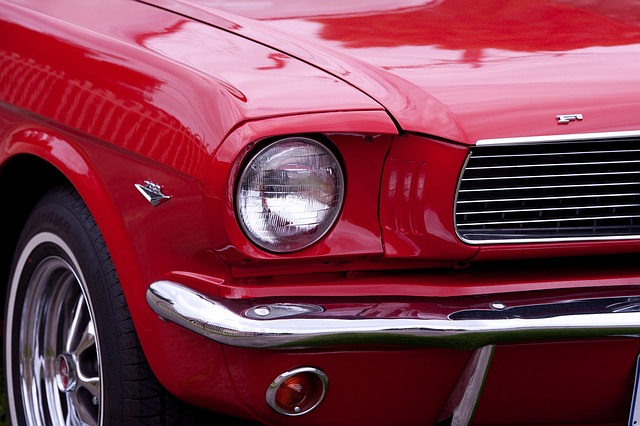
How to clean Car Headlights: Step-by-Step Guide
Cloudy, yellowed headlights don’t just dull your car’s appearance—they compromise nighttime visibility and safety. Over time, UV exposure, road debris, and oxidation degrade polycarbonate lenses, reducing light output by up to 50%. Fortunately, restoring them to like-new clarity is easier than you think. Below, we break down professional-grade techniques and budget-friendly DIY hacks to clean car headlights, ensuring safer drives and a sharper-looking vehicle.
Cloudy or yellowed headlights don’t just make your car look dated—they reduce visibility by up to 50%, turning nighttime drives into a safety gamble. Whether your headlights are hazy from UV damage, road grime, or oxidation, these DIY methods will restore clarity without breaking the bank. Below, we break down step-by-step techniques to clean car headlights, ensuring safer roads and a sharper-looking vehicle.
Topics Covered in This Article
- 1 How to Clean Car Headlights with Toothpaste: A Step-by-Step Guide for Safer, Brighter Lights
- 2 How to Clean Car Headlights with Vinegar: A Safe, Budget-Friendly Solution
- 3 Cleaning Car Headlights with Vinegar & Baking Soda: A Powerful DIY Duo
- 4 Cleaning Car Headlights with Ash Paste: A Natural, Eco-Friendly Method
- 5 How to Clean Car Headlights with Sandpaper & Soap: A Pro-Grade Restoration Guide
- 6 Cleaning & Polishing Kits for Car Headlights: A Comprehensive Guide to Professional-Grade Results
- 6.1 What’s Inside a Typical Kit
- 6.2 Top Brands to Consider
- 6.3 Step-by-Step Process
- 6.4 Pros of Restoration Kits
- 6.5 Cons to Consider
- 6.6 When to Choose a Kit Over DIY Methods
- 6.7 Key Tips for Success
- 6.8 Why UV Sealant is Non-Negotiable
- 6.9 Maintenance After Restoration
- 6.10 Beyond Headlights: Full Car Care
- 7 Why Clean Headlights Still Don’t Illuminate Properly: Troubleshooting Tips
Why Clean Headlights Matter
- Safety First: Foggy headlights scatter light, reducing road illumination and blinding oncoming drivers.
- Avoid Fines: Many states (e.g., California, Texas) mandate functional headlights; haze can lead to citations.
- Resale Value: Clear headlights boost curb appeal, adding $$$ to your car’s resale price.
What Causes Headlight Haze?
- UV Damage: Sunlight breaks down the protective UV coating, causing yellowing.
- Oxidation: Oxygen reacts with the polycarbonate plastic, creating a cloudy film.
- Road Grime: Dirt, bugs, and brake dust etch the lens surface over time.
How to Clean Car Headlights with Toothpaste: A Step-by-Step Guide for Safer, Brighter Lights
Using toothpaste to clean foggy or yellowed headlights is a popular DIY hack that leverages its mild abrasives and whitening agents to restore clarity. While not a permanent fix, it’s a quick, budget-friendly solution for mild oxidation. Here’s how to do it safely and effectively:
What You’ll Need
- Whitening toothpaste (non-gel, avoid formulas with baking soda or charcoal for plastic lenses)
- Microfiber cloths (soft, scratch-free)
- Masking tape (to protect paint)
- Car shampoo or mild soap
- Water (for rinsing)
- UV sealant or car wax (optional, for lasting protection)
Step-by-Step Instructions
1. Pre-Clean the Headlights
- Wash the headlights with car shampoo or a mild soap-water solution to remove dirt, bugs, and debris.
- Scrub gently with a soft sponge or microfiber cloth, focusing on crevices where grime collects.
- Rinse thoroughly and dry with a microfiber towel.
Pro Tip: For stuck-on bugs, soak a cloth in warm water and lay it over the headlight for 5 minutes to soften residue.
2. Protect Surrounding Areas
- Use masking tape to outline the headlight edges, shielding the car’s paint from accidental scratches.
3. Apply Toothpaste
- Squeeze a pea-sized amount of toothpaste onto a damp microfiber cloth or your fingertip.
- Rub the toothpaste onto the headlight in small, circular motions, covering the entire surface.
- Focus on cloudy or yellowed areas, applying moderate pressure.
Why This Works: Toothpaste’s mild abrasives (like hydrated silica) act as a polishing agent, buffing away surface oxidation.
4. Let It Sit (But Not Too Long!)
- Allow the toothpaste to sit for 3–5 minutes. Avoid letting it dry completely—this makes removal harder.
Warning: Over-drying can leave residue or haze.
5. Rinse & Polish
- Rinse the headlight with clean water, using a microfiber cloth to wipe away toothpaste residue.
- For stubborn spots, dampen the cloth and repeat circular motions.
- Dry thoroughly with a clean microfiber towel.
Check for Clarity: Shine a flashlight to ensure all haze is gone. Repeat steps 3–5 if needed.
6. Seal for Longevity
- Apply a UV-resistant sealant (e.g., Meguiar’s Headlight Coating) or car wax to protect against future oxidation.
- Buff gently with a microfiber cloth for a glossy finish.
Key Tip: Sealant extends results from weeks to months!
When Toothpaste Works Best
- Mild Oxidation: Surface-level haze or slight yellowing.
- Quick Fixes: Pre-road trip touch-ups or between professional cleanings.
- Budget-Friendly: No need for specialized products.
Limitations & Warnings
- Temporary Results: Expect clarity to last 2–4 weeks without sealant.
- Avoid Gel Toothpaste: It lacks abrasives and may leave streaks.
- Not for Severe Damage: Deep scratches or internal moisture require professional kits or replacement.
- Test First: Try on a small, hidden area to check for scratches (rare but possible with gritty formulas).
Why Skip the Gel?
Gel toothpaste lacks the gritty texture needed to buff away oxidation. Stick to traditional whitening pastes like Colgate Total or Crest Pro-Health.
Final Thoughts
Toothpaste is a handy shortcut for brightening headlights, but it’s just the first step. For long-term clarity, combine this hack with regular maintenance and UV protection. If haze returns quickly, consider upgrading to a headlight restoration kit (like 3M’s) or professional service.
Safety Reminder: Clear headlights aren’t just about looks—they’re critical for nighttime visibility. Keep them clean, drive safe, and enjoy the road!
Pro Tip: After cleaning, check your headlight alignment—misaligned beams can reduce visibility even with clear lenses!
How to Clean Car Headlights with Vinegar: A Safe, Budget-Friendly Solution
Vinegar’s mild acidity makes it an excellent choice for dissolving oxidation, grime, and UV-induced cloudiness on polycarbonate headlights. While not as abrasive as toothpaste or sandpaper, it’s ideal for routine maintenance or mild haze. Here’s a detailed, step-by-step guide to restore clarity safely and effectively.
What You’ll Need
- White distilled vinegar (1 cup)
- Warm water (1 cup)
- Spray bottle or microfiber cloth
- Mild car soap or dish detergent
- Soft-bristle toothbrush (optional)
- Microfiber towels
- UV-resistant headlight sealant (e.g., Meguiar’s G17804)
- Masking tape (to protect paint)
Step-by-Step Instructions
1. Prepare the Vinegar Solution
- Mix 1 cup white vinegar with 1 cup warm water in a spray bottle.
(Heating vinegar is unnecessary and risky—warm water dilutes it safely.)
2. Pre-Clean the Headlights
- Wash headlights with car soap and water to remove surface dirt, bugs, and debris.
- Dry thoroughly with a microfiber cloth.
Pro Tip: For stuck-on bugs, soak a vinegar-dampened cloth over the lens for 5 minutes before scrubbing.
3. Protect Surrounding Paint
- Use masking tape to outline the headlight edges, shielding the car’s finish from vinegar exposure.
4. Apply the Vinegar Solution
- Spray the vinegar mixture generously onto the headlight.
- OR: Soak a microfiber cloth in the solution and wipe the lens in circular motions.
- Let sit for 3–5 minutes (avoid drying completely).
Why It Works: Vinegar’s acetic acid breaks down oxidation and dissolves mineral deposits without harsh scrubbing.
5. Scrub Gently (If Needed)
- For stubborn haze, use a soft-bristle toothbrush dipped in vinegar to scrub gently in circles.
6. Rinse & Dry
- Rinse thoroughly with clean water.
- Dry with a microfiber towel to prevent water spots.
7. Seal for Longevity
- Apply a UV-resistant sealant to protect against future sun damage. Buff with a clean cloth.
When to Use Vinegar
- Mild Haze: Early-stage cloudiness from UV exposure.
- Mineral Deposits: Hard water spots or road salt residue.
- Preventative Maintenance: Monthly cleaning to delay oxidation.
Limitations & Safety Tips
- Avoid Undiluted Vinegar: Full strength can dry out plastic over time.
- Skip Abrasive Tools: Steel wool or rough sponges scratch lenses.
- Don’t Overuse: Limit to once a month to preserve the UV coating.
- Test First: Check on a small area if headlights are aged or cracked.
Boost Results for Tough Oxidation
- Vinegar + Baking Soda Paste:
- Mix 2 tbsp baking soda with 1 tbsp vinegar to form a paste.
- Apply, scrub gently, rinse, and seal.
- Vinegar + Toothpaste Combo:
- Alternate between vinegar wipe and toothpaste polish for moderate haze.
Why Pair with UV Sealant?
Vinegar cleans but doesn’t protect. A UV sealant:
- Blocks sun damage for 6–12 months.
- Repels dirt and water spots.
- Prevents rapid re-yellowing.
When to Upgrade to Professional Methods
If vinegar doesn’t work, consider:
- Headlight Restoration Kit (e.g., 3M or Sylvania) for deep scratches.
- Professional Service for severe internal moisture or cracks.
Final Thoughts
Vinegar is a simple, eco-friendly way to maintain headlight clarity and boost nighttime safety. For best results, pair it with regular washes and UV protection. While not a cure-all, it’s a great first step before investing in pricier solutions.
🚗 Pro Tip: Clean headlights every 3 months if your car parks outdoors—sunshine is the #1 cause of haze!
By integrating vinegar into your car care routine, you’ll save money, avoid harsh chemicals, and keep your lights shining bright.
Cleaning Car Headlights with Vinegar & Baking Soda: A Powerful DIY Duo
When your car’s headlights are heavily clouded or stained, combining vinegar and baking soda creates a fizzy, abrasive paste that tackles stubborn oxidation and grime. While the two ingredients neutralize each other’s pH, their reaction helps loosen debris, and the baking soda’s grit provides gentle scrubbing power. Here’s how to use them safely and effectively:
What You’ll Need
- White distilled vinegar (1/2 cup)
- Baking soda (2–3 tbsp)
- Warm water (1 cup)
- Soft-bristle toothbrush or microfiber cloth
- Mild car soap
- Masking tape (to protect paint)
- UV-resistant sealant (e.g., Meguiar’s Headlight Coating)
Step-by-Step Guide
1. Protect Surrounding Areas
- Use masking tape to outline the headlight edges, shielding the car’s paint from accidental scratches or vinegar exposure.
2. Pre-Clean the Headlights
- Wash the headlights with car soap and water to remove surface dirt, bugs, and debris. Dry thoroughly with a microfiber cloth.
3. Create the Cleaning Paste
- In a bowl, mix 2–3 tbsp baking soda with 1–2 tbsp vinegar to form a thick paste.
(The mixture will fizz—this reaction helps lift dirt but neutralizes acidity. The baking soda remains gritty for scrubbing.)
4. Apply & Scrub
- Using a soft-bristle toothbrush or cloth, apply the paste in small circular motions, focusing on cloudy areas.
- For tough oxidation, let the paste sit for 3–5 minutes (do not let it dry completely).
5. Rinse & Repeat (If Needed)
- Rinse thoroughly with warm water and dry with a microfiber towel.
- Inspect under sunlight or a flashlight. Repeat for persistent haze.
6. Final Wash & Seal
- Wash the headlights again with soapy water to remove residue.
- Dry completely and apply a UV-resistant sealant to prevent future yellowing.
Why This Works
- Vinegar: Dissolves oxidation and mineral deposits with its mild acidity.
- Baking Soda: Acts as a gentle abrasive to scrub away haze without scratching.
- Reaction: The fizzing helps dislodge embedded grime.
When to Use This Method
- Moderate Oxidation: Yellowing or cloudiness caused by UV exposure.
- Stubborn Stains: Bug splatter, road tar, or hard water spots.
- Budget Fix: A cheaper alternative to restoration kits.
Limitations & Warnings
- Temporary Results: Expect clarity to last 1–3 months without sealant.
- Avoid Delicate Lenses: Do not use on cracked or internally fogged headlights.
- Test First: Check a small area to ensure no scratching (rare but possible).
- Don’t Over-Scrub: Excessive force can damage the UV coating.
Pro Tips for Better Results
- Boost with Toothpaste: Add a pea-sized amount of non-gel toothpaste to the paste for extra abrasion.
- Hot Water Rinse: Helps dissolve vinegar residue for a streak-free finish.
- Sealant Is Key: Reapply UV protection every 6 months for long-term clarity.
When to Upgrade
If haze persists, consider:
- Headlight Restoration Kit (e.g., 3M or SYLVANIA) for deep scratches.
- Professional Service: For 50–50–150, experts sand and seal lenses for 1–2 years of clarity.
Final Note
While vinegar and baking soda won’t replace professional solutions, they’re a cost-effective way to revive mildly foggy headlights. Pair this hack with regular washes and UV protection to keep your lights shining bright and your nighttime drives safe!
🚗 Why It Matters: Clear headlights improve visibility by up to 70%, reducing accident risks. Don’t let cloudy lenses compromise safety!
Cleaning Car Headlights with Ash Paste: A Natural, Eco-Friendly Method
Using wood ash to clean car headlights is an unconventional but effective DIY hack, leveraging its mild abrasive properties to polish away oxidation and grime. While not as common as toothpaste or vinegar, it’s a sustainable way to repurpose fireplace ash. Here’s how to do it safely and avoid scratches:
What You’ll Need
- Fine, sifted wood ash (free of debris, charcoal chunks, or unburned wood)
- Distilled water (prevents mineral streaks)
- Microfiber cloths (soft, lint-free)
- Masking tape (to protect paint)
- UV-resistant sealant (e.g., Meguiar’s Headlight Coating)
- Strainer or sieve (to filter ash)
Step-by-Step Instructions
1. Prepare the Ash
- Sift the ash through a fine sieve to remove large particles or debris.
- Test the ash: Rub a small amount between your fingers—it should feel powdery, not gritty.
2. Protect Surrounding Areas
- Use masking tape to outline the headlight edges, shielding the car’s paint.
3. Create the Ash Paste
- Mix 2 parts sifted ash with 1 part distilled water to form a thick, spreadable paste.
- Adjust consistency as needed (add water for thinner paste, ash for thicker).
4. Apply & Polish
- Dip a microfiber cloth into the paste.
- Gently rub the headlight in small circular motions, focusing on cloudy areas.
- Let sit for 2–3 minutes (do not let it dry completely).
5. Remove Residue
- Wipe off the paste with a dry microfiber cloth.
- Dampen a second cloth with water and wipe again to eliminate leftover ash.
- Dry thoroughly with a clean cloth.
6. Seal the Headlights
- Apply a UV-resistant sealant to protect against future oxidation. Buff gently.
Why Ash Works
- Natural Abrasive: Fine ash particles act like a gentle polishing compound.
- Alkaline Properties: Neutralizes acidic contaminants like bug splatter.
- Zero Waste: Repurposes fireplace ash instead of discarding it.
When to Use Ash Paste
- Light Oxidation: Mild haze or surface-level yellowing.
- Eco-Conscious Cleaning: Ideal for sustainable DIYers.
- Quick Touch-Ups: Between professional cleanings.
Limitations & Warnings
- Risk of Scratches: Gritty or unfiltered ash can scratch polycarbonate lenses.
- Temporary Results: Clarity lasts 2–4 weeks without sealant.
- Avoid on Cracks/Scratches: Ash can settle into imperfections, worsening damage.
- Not for Severe Haze: Upgrade to a restoration kit for deep oxidation.
Pro Tips for Success
- Test First: Apply ash paste to a small, hidden area to check for scratches.
- Use Fresh Ash: Avoid ash exposed to moisture, which can clump.
- Combine with Vinegar: Pre-clean with a 1:1 vinegar-water solution to dissolve grime.
Alternatives to Ash Paste
| Method | Best For | Longevity |
|---|---|---|
| Toothpaste | Mild haze | 1–3 months |
| Vinegar + Baking Soda | Moderate oxidation | 2–6 months |
| 3M Restoration Kit | Severe damage | 1–2 years |
Final Thoughts
Ash paste is a creative, eco-friendly way to clean lightly oxidized headlights. While it’s not a permanent fix, it’s perfect for sustainability-minded car owners or as a temporary solution. For long-term clarity, always follow up with UV sealant and consider professional restoration for heavily damaged lenses.
🚗 Safety Note: Clear headlights improve nighttime visibility by up to 70%—never compromise on this critical safety feature!
How to Clean Car Headlights with Sandpaper & Soap: A Pro-Grade Restoration Guide
Using sandpaper with soap and water is a highly effective method to remove stubborn yellowing and oxidation from polycarbonate headlights. This technique, often called wet sanding, smooths out surface imperfections and restores clarity. However, precision is key to avoid damaging the lenses. Here’s how to do it safely and effectively:
What You’ll Need
- Wet/dry sandpaper (800, 1000, 1500, and 2000 grit)
- Liquid car soap or dish soap
- Spray bottle with water
- Microfiber towels
- Masking tape (to protect paint)
- Plastic polish (e.g., Meguiar’s PlastX)
- UV-resistant headlight sealant (e.g., 3M Headlight Clear Coat)
Step-by-Step Instructions
1. Prep the Headlights
- Wash headlights with soapy water to remove dirt and debris. Dry thoroughly.
- Mask off surrounding paint with tape to prevent accidental scratches.
2. Wet Sanding Process
Start with Coarse Grit (800–1000):
- Mix 1 tbsp soap with 2 cups water in a spray bottle.
- Soak the sandpaper in water for 5 minutes.
- Spray the headlight with soapy water.
- Sand in straight lines (not circles!) using moderate pressure. Keep the surface wet.
- Wipe frequently with a damp cloth to check progress.
Progress to Finer Grits (1500–2000):
- Repeat with 1500-grit, then 2000-grit sandpaper, always keeping the surface lubricated.
- Goal: Remove scratches from the previous grit until the lens feels smooth.
Why Straight Lines? Circular motions create swirl marks; straight lines ensure even abrasion.
3. Rinse & Clean
- Rinse the headlight thoroughly to remove soap and sanding residue.
- Dry with a microfiber towel.
4. Polish for Clarity
- Apply plastic polish to a clean microfiber cloth.
- Buff the lens in small circles until haze disappears and clarity returns.
5. Seal for Longevity
- Apply UV-resistant sealant to protect against future oxidation. Follow product instructions for curing time.
Why This Method Works
- Sanding: Removes the oxidized outer layer of the polycarbonate.
- Polishing: Restores optical clarity by smoothing micro-scratches.
- Sealing: Blocks UV rays, delaying re-yellowing.
Common Mistakes to Avoid
- Skipping Grit Steps: Jumping from 800 to 2000 grit leaves deep scratches.
- Dry Sanding: Generates heat, warping the lens.
- Using Household Soap: Some contain moisturizers that leave residue—stick to car soap.
When to Use This Method
- Severe Oxidation: Thick yellowing or deep scratches.
- Pre-Restoration Prep: Before applying a professional sealant.
Cost & Time
- Cost: 15–15–30 (sandpaper, polish, sealant).
- Time: 1–2 hours.
- Results Last: 1–2 years with proper sealing.
Alternatives for Mild Cases
| Method | Effort | Longevity |
|---|---|---|
| Toothpaste | Low | 1–3 months |
| Vinegar + Baking Soda | Medium | 3–6 months |
| Wet Sanding | High | 1–2 years |
Pro Tip: After sanding, use a headlight restoration kit (e.g., Sylvania) for a factory-fresh finish.
By mastering this technique, you can ensure your headlights shine safely for years and save hundreds on professional services! 🚗💡
Do you want to know how to clean car upholstery? In this article, we tell you the best tricks.
Cleaning & Polishing Kits for Car Headlights: A Comprehensive Guide to Professional-Grade Results
When DIY methods like toothpaste or vinegar fall short, headlight cleaning and polishing kits offer a systematic, long-lasting solution for yellowed, foggy, or oxidized headlights. These kits combine specialized tools and chemicals to restore clarity, protect against UV damage, and deliver near-professional results at home. Here’s everything you need to know:
What’s Inside a Typical Kit
- Abrasive Pads or Sandpaper (800–3000 grit) – For wet sanding to remove oxidation.
- Polishing Compound – Restores gloss by smoothing micro-scratches.
- Buffing Pads (wool or foam) – Attach to a drill for machine-powered polishing.
- UV-Resistant Clear Coat Spray – Seals the lens to prevent future yellowing.
- Microfiber Cloths & Gloves – For safe handling and finishing.
Top Brands to Consider
- 3M Headlight Restoration Kit (20–20–30): Industry standard with multi-grit sanding discs and sealant.
- SYLVANIA Headlight Restoration Kit (15–15–25): Includes UV-blocking clear coat for lasting protection.
- Meguiar’s G2970 Two-Step Kit ($15–20): No sanding required—uses polishing compounds and sealant.
Step-by-Step Process
- Clean & Mask
- Wash headlights with soapy water.
- Use masking tape to protect surrounding paint.
- Wet Sand
- Start with 800–1000 grit to strip oxidation, then progress to 2000–3000 grit for smoothing.
- Keep the surface wet to avoid heat damage.
- Polish
- Apply compound to a buffing pad (hand or drill-powered).
- Work in small circles until haze disappears.
- Seal
- Spray UV-resistant clear coat in thin, even layers.
- Let dry 24–48 hours before washing.
Pros of Restoration Kits
- Longevity: Results last 1–3 years with proper sealing vs. weeks for DIY methods.
- Precision: Tackles deep oxidation and scratches unreachable by home remedies.
- All-in-One: No need to source separate tools or products.
Cons to Consider
- Cost: Kits range from 15–15–50, pricier than toothpaste or vinegar.
- Time: Requires 1–3 hours of labor.
- Skill Required: Over-sanding or uneven clear coat application can worsen damage.
When to Choose a Kit Over DIY Methods
| Scenario | Best Solution |
|---|---|
| Severe Yellowing | Restoration Kit |
| Deep Scratches | Restoration Kit |
| Mild Haze | Toothpaste/Vinegar |
| Quick Touch-Up | Baking Soda Paste |
Key Tips for Success
- Avoid Direct Sunlight: Apply clear coat in shaded, dust-free areas.
- Thin Coats: Multiple light layers of sealant prevent drips.
- Test First: Try polishing a small area to gauge abrasion needed.
Why UV Sealant is Non-Negotiable
Without a protective topcoat, UV rays will re-oxidize lenses within months. Quality kits include acrylic or polyurethane sealants that:
- Block 99% of UV radiation.
- Repel dirt and water spots.
- Resist yellowing for years.
Maintenance After Restoration
- Monthly: Clean with car shampoo and soft brush.
- Bi-Annual: Reapply UV sealant if haze reappears.
- Avoid Harsh Chemicals: Ammonia-based cleaners degrade the clear coat.
Beyond Headlights: Full Car Care
For a showroom-ready vehicle, pair headlight restoration with:
- Dashboard Cleaning: Use interior protectant wipes to prevent cracking.
- Windshield Decontamination: Remove water spots with 0000-grade steel wool.
- Paint Correction: Buff out swirl marks with dual-action polishers.
Final Takeaway
Headlight restoration kits are ideal for tackling severe oxidation or achieving long-lasting clarity. While pricier and more labor-intensive than DIY hacks, they’re a worthwhile investment for safety and aesthetics. For routine upkeep, stick to vinegar or toothpaste—but when yellowing strikes, a kit is your best bet.
🔧 Pro Tip: Pair your kit with a cordless drill for faster, more even polishing!
By mastering these kits, you’ll save hundreds on professional services and keep your car looking—and driving—like new. 🚗✨
Why Clean Headlights Still Don’t Illuminate Properly: Troubleshooting Tips
Even after thorough cleaning, dim headlights can signal deeper issues beyond surface haze. Here’s how to diagnose common problems and decide when to visit a mechanic:
1. Check the Bulbs
- Old/Weak Bulbs: Halogen bulbs dim over time. Replace them every 2–3 years (or 500–1,000 hours of use).
- Bulb Type: Ensure you’re using the correct wattage (e.g., H7, H11).
- Test: Swap bulbs between left and right headlights. If one side stays dim, the bulb is likely faulty.
DIY Fix: Replace bulbs yourself (consult your owner’s manual). Opt for LED or HID upgrades for brighter light.
2. Inspect Electrical Connections
- Corroded Terminals: Check for green/white corrosion on bulb sockets or wiring harnesses. Clean with electrical contact cleaner and a wire brush.
- Loose Wiring: Ensure connectors are snug. Wiggle wires while lights are on—flickering indicates a loose connection.
- Fuses: Locate the headlight fuse in your car’s fuse box (often labeled “HEAD” or “LOW BEAM”). Replace if blown.
Safety Tip: Disconnect the battery before handling electrical components.
3. Look for Internal Damage
- Moisture Buildup: Condensation or water inside the housing scatters light. Dry with a hairdryer (low heat) and reseal cracks with clear silicone.
- Degraded Reflectors: Yellowed or peeling reflective coating reduces brightness. Requires headlight replacement.
- Hazing Inside the Lens: If polishing the exterior didn’t help, internal oxidation means the assembly needs replacing.
4. Test the Alternator & Battery
- Weak Alternator: Use a multimeter to check voltage with the engine running. It should read 13.5–14.5V. Lower values mean the alternator isn’t charging properly.
- Dying Battery: Dim lights at idle that brighten when revving indicate a weak battery.
5. Adjust Headlight Alignment
- Misaligned Beams: Park on level ground 10 feet from a wall. The top of the beam should sit 2–4 inches below the headlight height. Adjust via screws on the headlight housing.
- DIY Guide: Many YouTube tutorials show alignment steps for your car model.
When to Visit a Mechanic
- Flickering Lights: Could indicate alternator or wiring issues.
- Both Headlights Fail: Likely a blown fuse, relay, or wiring problem.
- Error Messages: Modern cars with LED/HID systems may show “Headlight Malfunction” alerts.
- Persistent Moisture: Sealed assemblies shouldn’t leak—professional resealing or replacement is needed.
Upgrade Options for Better Illumination
- LED Bulbs: Brighter, whiter light with longer lifespan (e.g., Philips Ultinon).
- HID Kits: High-intensity discharge bulbs for maximum brightness (check local legality).
- OEM Replacements: For cars with internal reflector damage.
Safety First
Driving with poorly functioning headlights risks accidents and tickets. If DIY checks don’t resolve the issue, schedule a diagnostic with a trusted mechanic. They can pinpoint electrical faults, alignment problems, or internal damage efficiently.
By addressing these hidden culprits, you’ll ensure your cleaned headlights shine safely and effectively! 🚗💡